
Choosing Real Wood Planks is not only a style decision. It affects comfort, durability, maintenance, and long-term value. A warm oak plank may look perfect online, yet its width, moisture content, finish, and installation method matter inside a real home. Sunlight near a glass door can fade one area. Damp subfloors can create movement, gaps, or unpleasant squeaks.
Industry data shows why careful selection matters. The National Wood Flooring Association’s 2024 State of the Industry Report estimated U.S. wood flooring sales at approximately $4.6 billion in 2023, reflecting continued consumer demand. Grand View Research also identifies rising renovation activity as a major driver of the global wood flooring market. These figures suggest confidence, but they do not guarantee that every plank suits every room.
Brett Miller, an education and certification expert with the National Wood Flooring Association, states, “Wood flooring is one of the few flooring products that can be refinished multiple times.” That advantage depends on choosing the right construction and wear layer. It is easy to focus on color first. That may be the wrong starting point. Species, grade, plank stability, finish quality, and responsible sourcing deserve equal attention.
The following seven tips examine those details closely. They cover appearance, performance, installation conditions, and future repairs. Some recommendations may feel less exciting than comparing samples. Still, the quiet technical choices often determine whether Real Wood Planks remain beautiful after years of footsteps, furniture, dust, and changing seasons. No selection is perfect. A thoughtful one is usually more forgiving.
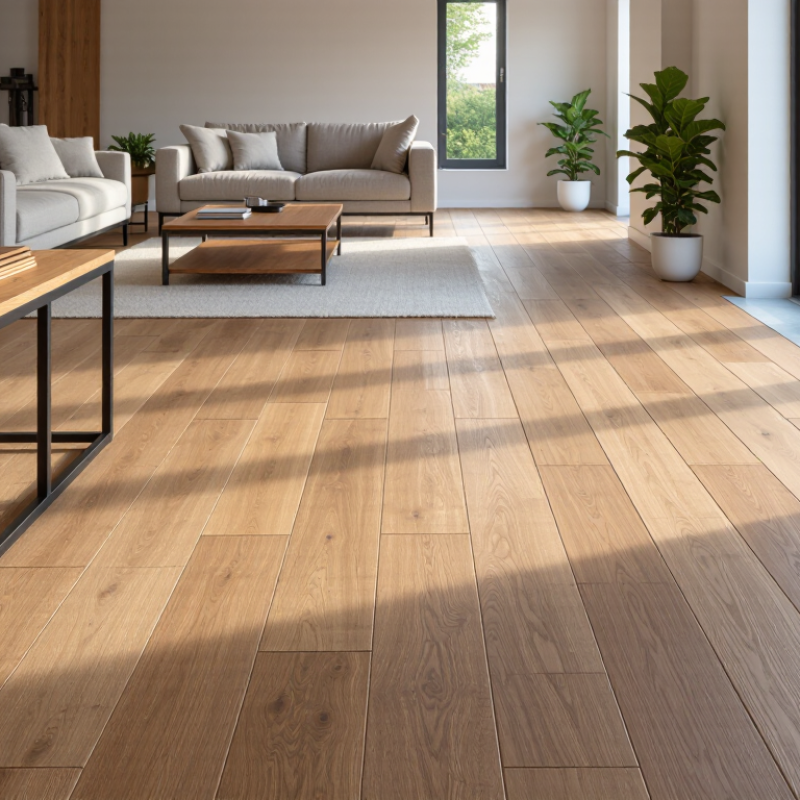
Choosing real wood planks starts with the room, not the color chart. Ask how the space will work each day. A busy hallway needs harder, more stable boards than a quiet guest room. Measure foot traffic, moisture, sunlight, furniture weight, and cleaning habits before comparing wood species. Bathrooms and damp basements demand extra caution, because solid wood can move when humidity changes. That movement is normal. Still, ignoring it is a costly mistake. An experienced installer should check subfloor moisture and indoor humidity before recommending plank widths and installation methods. Wide planks look calm and spacious, but they may show seasonal gaps more clearly. That tradeoff deserves an honest discussion.
Think about the plank’s intended use beyond walking. Will children drag toys across it? Will dining chairs scrape the surface? Will direct afternoon sun reach one section for years? These details guide decisions about finish, hardness, thickness, and repairability. A matte finish can hide small marks better than a glossy one. Thicker material may allow future refinishing, but only if its construction supports it. Ask for documented specifications, moisture guidance, and realistic maintenance instructions. Do not trust appearance alone.
Place samples in the actual room for several days. View them in morning, afternoon, and artificial light. Wood grain varies, even within one carton. I once overlooked a sunny doorway during planning, and the color change became obvious. That oversight taught me to map light before choosing samples. Allow planks to acclimate according to the supplier’s written instructions, and keep spare boards stored flat and dry.
Choosing real wood planks begins with comparing species, not just photographs. Oak often shows visible rays and open grain, while maple usually looks smoother and more uniform. Walnut brings deeper brown tones and flowing patterns. Pine can feel warmer and more rustic, but its softer surface may mark sooner. I have found that a sample under store lighting can look completely different beside a sunny window.
Study the grain direction closely. Straight grain creates a calmer floor, while cathedral patterns add movement across wide boards. Rift-sawn planks tend to look consistent, whereas plain-sawn boards often reveal stronger arches and knots. Knots are not defects automatically. They can add character, but loose knots may need careful inspection. Run your hand across the sample. The surface should feel intentional, not carelessly milled.
Natural color variation deserves attention before installation. Even boards from the same tree can shift from honey to cream, gray-brown, or reddish tones. Place several samples together on the actual subfloor. Check them in morning, afternoon, and evening light. I once approved a warm sample that appeared too orange after installation. That mistake changed how I compare finishes now. Also examine moisture guidance and grading information from the supplier. Clear documentation is more dependable than vague claims about durability. A perfectly uniform floor may look attractive, but it can feel less authentic over time.
7 Tips for Choosing Real Wood Planks
Measure each plank’s width, thickness, and length before buying. Dimensions affect installation time and the floor’s final appearance. Wider boards can show more movement. Narrower boards often provide greater visual consistency. Check the milling closely. Tongues and grooves should fit without forcing. Bring a straightedge. Slight bends may become obvious across a large room.
Moisture deserves careful attention. Use a moisture meter on several boards, not only one sample. Compare readings with the room’s expected indoor conditions. Wood that feels dry may still hold hidden moisture. Allow the planks to acclimate inside the installation space. Follow the supplier’s guidance, but observe the actual room, too. Heating, sunlight, and concrete subfloors can change the timing. I once trusted a single reading and regretted it.
Inspect stability through grain direction, end cracks, knots, and surface tension. Quarter-sawn boards usually resist movement better than some plain-sawn boards, though appearance differs. Look for cupping, twisting, and open joints. Reject damaged pieces before installation. Ask about kiln drying, moisture testing, grading rules, and storage history. Reliable sellers should answer clearly and provide measurable specifications. Examine the finish under natural light. Small color changes are normal. Poorly sealed edges are not. Real wood is not perfectly uniform, and that is part of its character. Still, uneven quality can become an expensive lesson.
| Tip | Selection Factor | What to Check | Useful Reference Data | Quality Indicators and Warning Signs |
|---|---|---|---|---|
| 1 | Confirm the wood is solid | Examine the plank edge, end grain, and product description. Solid wood should consist of one continuous piece of timber rather than a veneer over a composite core. | Common solid flooring thicknesses include approximately 18–20 mm. Interior boards and furniture planks may be thinner or thicker depending on their intended use. | Good: Continuous end grain and a clearly stated wood species. Warning: Terms such as “wood-look,” “engineered,” or “veneer” when solid wood is required. |
| 2 | Measure plank dimensions | Measure thickness, width, length, and tongue-and-groove dimensions. Check several boards because small variations can affect installation and alignment. | Typical solid flooring widths range from about 75–180 mm, while lengths often vary from approximately 300–2,100 mm. Actual sizes depend on species and product grade. | Good: Consistent dimensions and clean, accurately machined edges. Warning: Warped edges, inconsistent thickness, or dimensions that differ significantly from the specification. |
| 3 | Check moisture content | Use a calibrated moisture meter suitable for the wood species, and take readings from multiple boards and locations. Allow the material to acclimate before installation. | For many climate-controlled interior applications, a moisture content near 6–9% is commonly targeted. The correct range depends on local indoor humidity and installation conditions. | Good: Readings are reasonably uniform and match the expected indoor environment. Warning: Large differences between boards, very wet surfaces, or storage in an uncovered damp area. |
| 4 | Evaluate dimensional stability | Place a straightedge along the face and edge. Look for bowing, cupping, crooking, twisting, and open end checks. | Minor natural movement is normal because wood expands and contracts with humidity. Stability is improved by proper drying, acclimation, and installation gaps. | Good: Boards lie relatively flat with tight joints after sorting. Warning: Severe cup, bow, twist, splits, or movement that prevents the boards from fitting together. |
| 5 | Inspect grade and natural features | Review the amount and size of knots, sapwood, mineral streaks, checks, and color variation. Select a grade that suits the desired appearance and use. | Clear or select grades generally have fewer visible defects; common or rustic grades normally contain more knots and color variation. Grade names are not identical across all suppliers. | Good: Natural features are sound, stable, and consistent with the stated grade. Warning: Loose knots, deep cracks, decay, insect damage, or defects hidden by heavy filler. |
| 6 | Assess surface and machining quality | Inspect the face for milling marks, raised grain, sanding scratches, torn fibers, and uneven finish. Test several tongue-and-groove joints if applicable. | A well-machined plank should have straight edges, clean profiles, and joints that fit without excessive force or gaps. Factory-finished surfaces should have even coverage. | Good: Smooth, consistent surfaces and accurately cut profiles. Warning: Damaged tongues, crushed grooves, uneven coating, burn marks, or visible planer chatter. |
| 7 | Verify storage, sourcing, and suitability | Ask how the planks were dried and stored, whether they are suitable for the intended application, and whether the wood is legally and responsibly sourced. | Store planks flat, supported, and protected from rain and direct ground contact. For flooring, follow the installation instructions for subfloor moisture, acclimation, and expansion gaps. | Good: Dry indoor storage, traceable product information, and clear installation guidance. Warning: Outdoor exposure, sealed wet packaging, missing documentation, or material not rated for the intended environment. |
Surface finish controls more than appearance. It affects stain resistance, repair options, and daily cleaning. A matte finish hides small scratches better than a glossy one. Factory-cured coatings usually provide more consistent coverage than site-applied finishes. However, no finish is maintenance-free. Check whether the surface tolerates damp mopping, household grit, and occasional refinishing.
Tip 1: Inspect sample boards under daylight. Look for uneven sheen, open knots, raised grain, and visible edge damage.
Tip 2: Ask for the finish type and recoat procedure.
Tip 3: Match the texture to traffic levels. Brushed surfaces add grip, but they can hold more dust.
The National Wood Flooring Association recommends keeping indoor relative humidity between 30% and 50%. That range helps limit seasonal movement, gaps, and cupping.
Durability also depends on plank thickness, wear-layer depth, and installation quality.
Tip 4: Confirm the usable wood above the tongue.
Tip 5: Prefer stable moisture readings before installation.
The USDA Forest Products Laboratory’s Wood Handbook notes that wood in conditioned interiors commonly reaches about 6% to 8% moisture content. Local conditions can differ.
Tip 6: Request a written maintenance schedule, including cleaner type and recoating intervals.
Tip 7: Examine the warranty exclusions carefully.
Real use is less tidy. Sand near an entryway, pet nails, and damp boots can expose weak finishes quickly. I once underestimated chair movement; the marks appeared within weeks. Choose repairability, not only showroom perfection.
7 Tips for Choosing Real Wood Planks
Real wood feels different underfoot, but quality starts before installation. Check where the timber comes from and ask for clear sourcing information. Look for recognized forest-management certification and traceable harvest details. Vague claims such as “eco-friendly” are not enough. Ask about species, region, drying methods, and transport distance. Local wood may reduce shipping impact, though not always. Verify the paperwork.
Set a complete budget, not just a price per square metre. Include underlayment, trims, fasteners, delivery, cutting waste, and professional labor. Add at least ten percent for mistakes or future repairs. It sounds excessive. It can prevent stress. A cheaper plank may need more sorting, sanding, or replacement. Compare finished costs instead of shelf prices. I have seen beautiful materials exceed budgets because installation details were ignored.
Installation conditions matter greatly. Measure room moisture and subfloor flatness before ordering. Store planks indoors and allow them to acclimate according to the manufacturer’s guidance. Leave expansion gaps near walls, door frames, and fixed cabinets. Confirm whether the floor needs adhesive, nails, or both. Check heating systems below the floor, since excessive heat can cause movement. Do not rush this stage. Even experienced installers sometimes underestimate seasonal changes. Request written instructions and keep spare planks for future repairs. A careful inspection under natural light can reveal color variation, dents, or warped edges before the first cut.
Compare species hardness before confirming sustainable sourcing, budget, and installation requirements. Higher Janka values generally indicate better resistance to dents, while lower values may be easier to cut and install.
Selection checklist: 1) Confirm the wood species and origin. 2) Look for credible sustainable-forest documentation. 3) Compare solid wood with engineered alternatives. 4) Include underlayment, fasteners, finishing, and labor in the budget. 5) Add an appropriate waste allowance for cuts and defects. 6) Check subfloor moisture and levelness. 7) Confirm acclimation, plank width, and installation method before ordering.
